
Response Actions
Response Actions are WHEN → THEN automations: when a trigger condition is met, WebDecoy executes the actions you’ve configured, pushing a block to your WAF or notifying your systems.
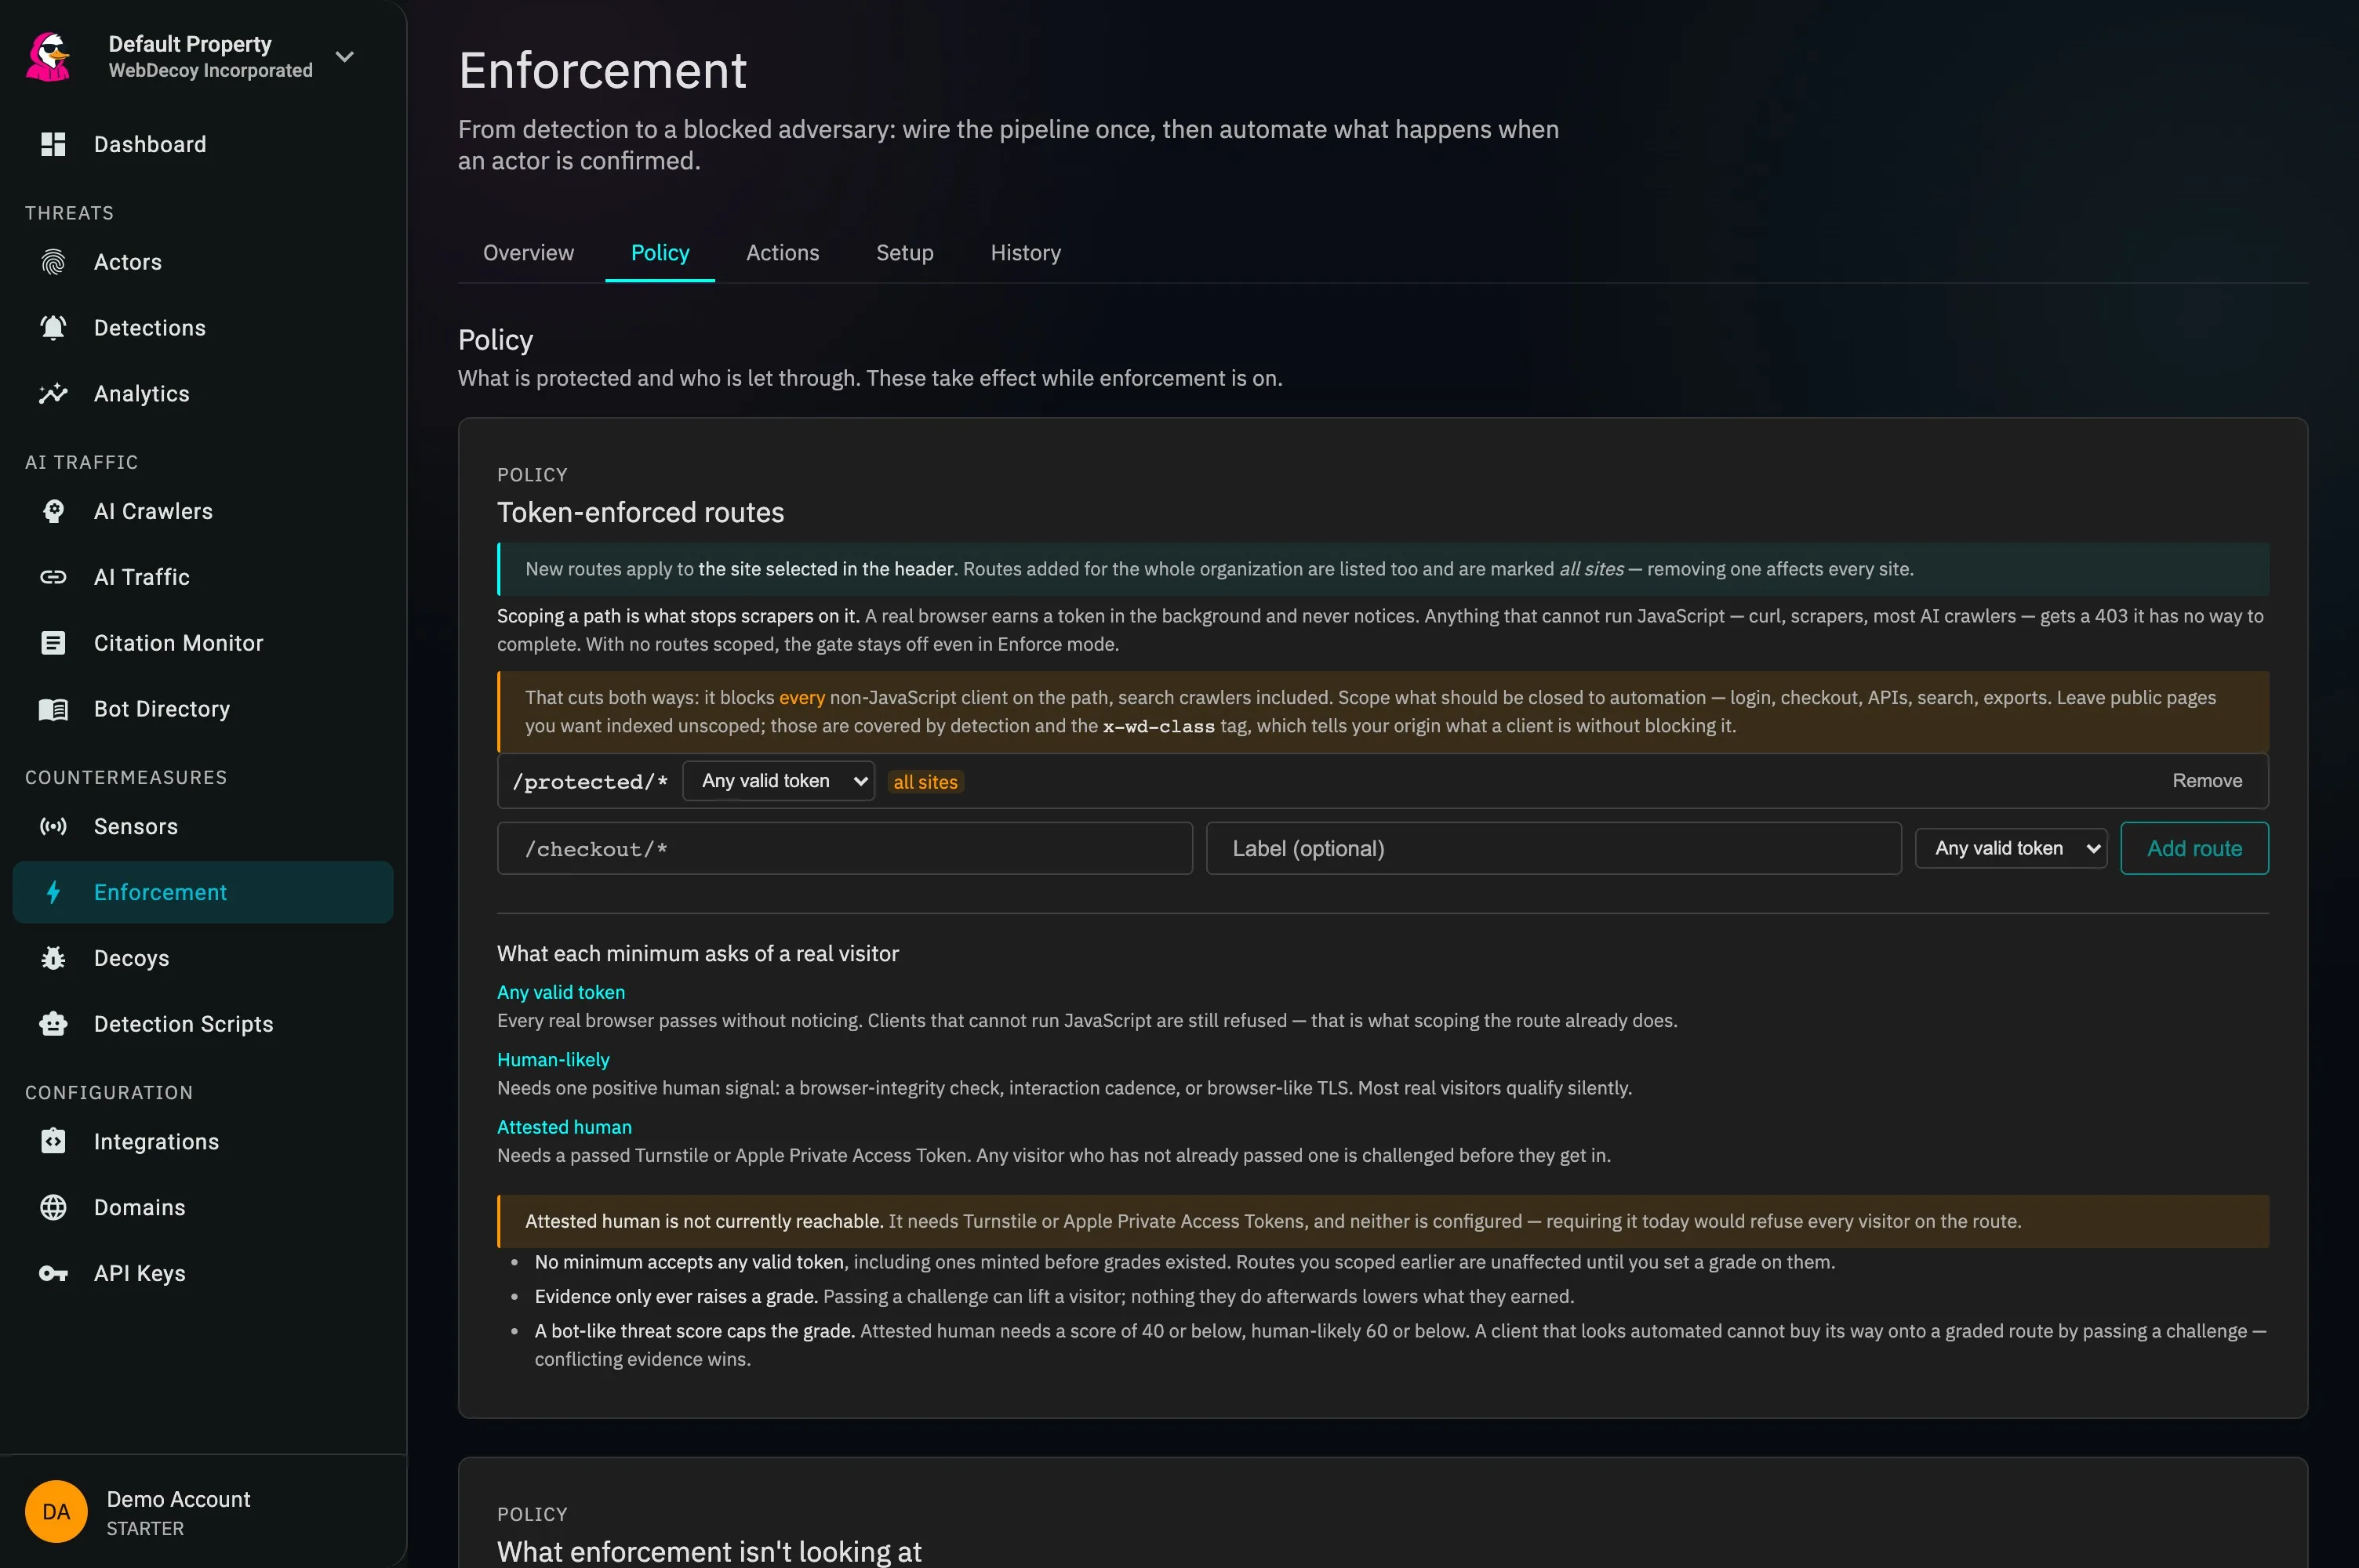
The current Enforcement policy screen makes route scope and trust requirements explicit before a rule can affect traffic.
For threat-scoring and enforcement capabilities, see the Response Rules product overview.
They have their own page under Enforcement: click Enforcement in the sidebar, then the Actions tab (/enforcement/actions). The Enforcement page is now a set of routed sub-pages, and each one owns a different job:
| Tab | What lives there |
|---|---|
Overview (/enforcement) |
the Monitor/Enforce switch and its readiness checks, the decision queue, and what the loop actually did |
Policy (/enforcement/policy) |
token-enforced routes and their minimum trust grades, the paths nothing is scoping, and the tokenless-client allowlist |
Actions (/enforcement/actions) |
Response Actions, the subject of this page |
Setup (/enforcement/setup) |
the one-time wiring: connect a WAF, the clearance token, deploy the edge validator |
History (/enforcement/history) |
the enforcement audit log |
Older links still work: /response-actions redirects to the Actions tab, and bookmarked ?tab= URLs forward to the sub-page that replaced them.
Anatomy of a Response Action
Section titled “Anatomy of a Response Action”Each Response Action has a name, an enabled toggle, one trigger, and one or more actions.
Triggers
Section titled “Triggers”| Trigger | Fires when |
|---|---|
| A confirmed rotating actor | An actor is confirmed rotating across multiple IP addresses with high aggregate threat |
| A high-risk detection | A single detection meets your score threshold (default 80) |
| Any detection | Every detection |
Actions
Section titled “Actions”| Action | What it does | Requires |
|---|---|---|
| Block actor at WAF | Pushes a fingerprint (JA4) rule to your connected WAF, blocking the actor across every IP it rotates through | A connected AWS WAF integration, or Cloudflare with Bot Management (see below) · rotating-actor trigger only |
| Block IP | Adds the detection’s IP address to your WAF’s managed block list, with an automatic expiry | A connected WAF integration |
| Webhook | Sends the event to a URL you provide | None |
| Emails your team when the trigger fires | None |
The editor shows which WAFs your organization has connected, so block actions are never a black box: if no WAF is connected, connect one under Integrations first.
Safety defaults
Section titled “Safety defaults”Actor-level enforcement is designed to fail safe:
- Fingerprint rules are confined to the confirmed-rotating-actor trigger, as above.
- IP blocks expire automatically: the duration is set on your WAF integration (default 24 hours). IPs rotate; there’s no value in blocking an address forever, and expiry protects future legitimate holders of that address.
- Monitor before you block: the AWS WAF integration’s action can be set to Count (Monitor Only), which logs what would be blocked without blocking it. Start there, review, then switch to Block.
Setting up a Response Action
Section titled “Setting up a Response Action”- Go to Enforcement in the sidebar and open the Actions tab
- Click New action
- Name it (e.g., “Block rotating scrapers”)
- Choose the trigger. For actor-level blocking, choose A confirmed rotating actor
- Enable the actions you want
- Save. The action runs automatically from then on
Starting from what prompted it
Section titled “Starting from what prompted it”A rule is usually wanted at the moment something bothers you, not while browsing a settings list, so the editor is reachable from the evidence:
- Respond to detections like this, in the detection flyout.
- Respond to actors like this, on an actor’s page, next to the deny control.
Opened either way, the editor names what it was opened from and preselects the trigger that origin implies. An actor gets the confirmed-rotating trigger, which is the one case fingerprint blocking is safe for. A detection gets a score threshold drawn from what that detection actually scored, rounded down to a band so the rule reads as “ones like this” rather than as one sample’s exact number. Everything is editable before you save.
The values a WAF rule needs
Section titled “The values a WAF rule needs”The detection flyout can copy the identifiers enforcement keys on, in the order they are usually reached for: the IP address, the JA4 handshake fingerprint, the ASN, the clearance fingerprint, and the user agent. Only values actually present on that detection are offered, because a copy button that yields nothing tells you a value exists when it does not.
Two of those are the identities enforcement acts on. JA4 is what a fingerprint rule blocks at your WAF. The clearance fingerprint is what a deny binds to, and it survives the IP rotation that makes an address-based block worthless. When a detection carries its own clearance fingerprint, that value is preferred over the actor’s rolled-up one: the rollup holds whatever is minting tokens now, while the detection holds what arrived with the request on screen.
Cloudflare status
Section titled “Cloudflare status”Cloudflare rule pushes are live. Cloudflare retired the legacy Firewall Rules API this integration originally used, and WebDecoy has been rebuilt on the Rulesets API.
One limit is worth knowing before you configure anything: fingerprint (JA4) rules need Cloudflare Bot Management, an Enterprise add-on. See the note above. block_ip and session clearance have no such requirement. AWS WAF has no equivalent gate.
Beyond WAF rules: session clearance
Section titled “Beyond WAF rules: session clearance”WAF rules are the right tool for datacenter and scripted bots. For browser-shaped traffic (real browsers automated from residential IPs, where no fingerprint or IP rule is safe), WebDecoy enforces with session clearance: real sessions earn a signed token, enforced routes require it, and a decoy hit revokes it durably on every IP. If you’re protecting login, checkout, or scraped endpoints on a Cloudflare-proxied site, set it up alongside your Response Actions.
API access
Section titled “API access”GET /api/organizations/{organization_id}/response-actionsPOST /api/organizations/{organization_id}/response-actionsPUT /api/organizations/{organization_id}/response-actions/{id}DELETE /api/organizations/{organization_id}/response-actions/{id}See API Keys for authentication.
Next Steps
Section titled “Next Steps”- Actors: the identity model behind actor-level blocking
- AWS WAF Integration: set up the WAF connection block actions push to
- Webhook Integration: event payloads for custom automation